5 Tips to Make your Listing Photos Look Great
Listing photos are usually a buyer’s first impression of your property. It can be the difference between them inquiring for a tour or skipping past your listing. According to the National Association of Realtors, the share of home buyers who used the internet to search for a home increased to an all-time high of 97%. Here are some tips to make sure your listing photos turn out great, regardless if you hire a professional or do it yourself.
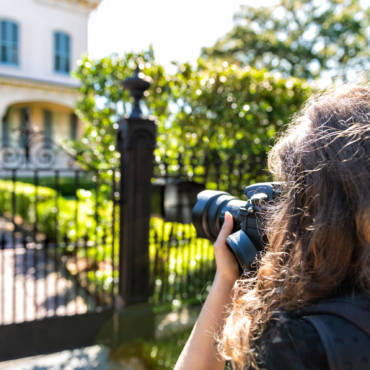
- Determine if You Will Hire a Professional
If you’re not confident with your real estate photography skills, consider hiring a local professional. A professional real estate photographer is often the fastest and easiest way to get the best, high-quality real estate images. Costs for a photographer can vary depending on the professional, but generally pricing starts around $100 and can go into the thousands. The price will vary depending on the size of the home, location, and the number of photos you require, as well. If you’re taking the listing photos yourself, be sure to continue reading for more tips.
2. Invest in a Wide-Angle Lens
If you do decide to take your own listing photos, it’s a good idea to invest in your photography equipment if you haven’t done so already. Wide angle lenses are great for real estate photography because you’re able to take photos that capture as much as possible, more than you would with a conventional lens. This allows buyers to get a better sense of the property as a whole, as if they were in the home themselves. Wide angle lenses range in prices, but there are affordable ones that can get the job done. If you don’t have a wide-angle lens, here are some tips for shooting real estate photos with a standard lens:
- Shoot from a doorway or corner. This can help make a room look more spacious by including as much as you can in the shot.
- Experiment with different angles. Play around with taking photos from different angles, once you review them on the computer, you’ll be able to see what worked and what didn’t.
- Landscape vs. Portrait. Analyze your spaces and determine which camera orientation works best. For example, if you’re trying to capture the foyer with a staircase, capture the photo in portrait; if you’re trying to capture an open floor plan, you would capture in landscape.
3. Prep the Property
Whether you’re hiring a professional or doing it yourself, it’s very important to make sure all aspects of your home is photo-ready before taking real estate photos. Deep clean your rooms to let buyers know that your property is well maintained and in good condition. Landscape the yard and trim any plants, trees, or bushes. Remove any clutter and personal items so they do not get in the photos, not only can this be a privacy concern but it doesn’t look good to buyers. Some other items that you may not think to put away are dish soap, sponges, paper towel rolls, fridge magnets, and other cleaning items and toiletry.
4. Reflect the Season
In conjunction with staging your home, you can add little touches in and outside your home to reflect the current season. We emphasize little touches, as you don’t want to overdo the decorations because that may deter buyer’s from seeing the home’s features. Here are some seasonal decoration ideas to add for each season:
- Spring: Place seasonal, local flowers around the home, outside the front door, or in the gardens. Make sure to take pictures of the garden if the home has one. Incorporate Spring colors with a throw pillow or accent towels in the kitchen or bathrooms.
- Summer: Utilize natural sunlight to brighten up your listing photos. You can place a fruit bowl in the kitchen or a pitcher of lemonade with fresh lemons. If your property features any deck space, be sure to include that!
- Fall: As the leaves are changing to beautiful colors, consider adding small decorations that resemble fall foliage and its colors; red, orange, yellow, and even sometimes purple.
- Winter: If your property has a fireplace, turn it on and take pictures that look inviting and cozy. If your home is in a location where you get snow, take a picture of your exterior after a fresh snowfall.
5. Keep Lighting Consistent
In real estate photography, lighting is crucial to a great, high-quality photo. Ideally, you want your listing photos to be consistent with its lighting. To begin, determine if the lights are better on or off. Turning on lights have the ability to make a space feel warmer and welcoming, but in combination with natural light, interior lighting can imbalance a photo in the end result. On the contrary, using only natural light can make a photo feel cold if there’s not enough light coming through the windows. In addition, make sure all the lightbulbs that are being used in the listing photos are the same. Varying light can make a room feel unbalanced. Only use the flash if you absolutely have to, pointing a flash directly at a space can create uneven light and a glare.